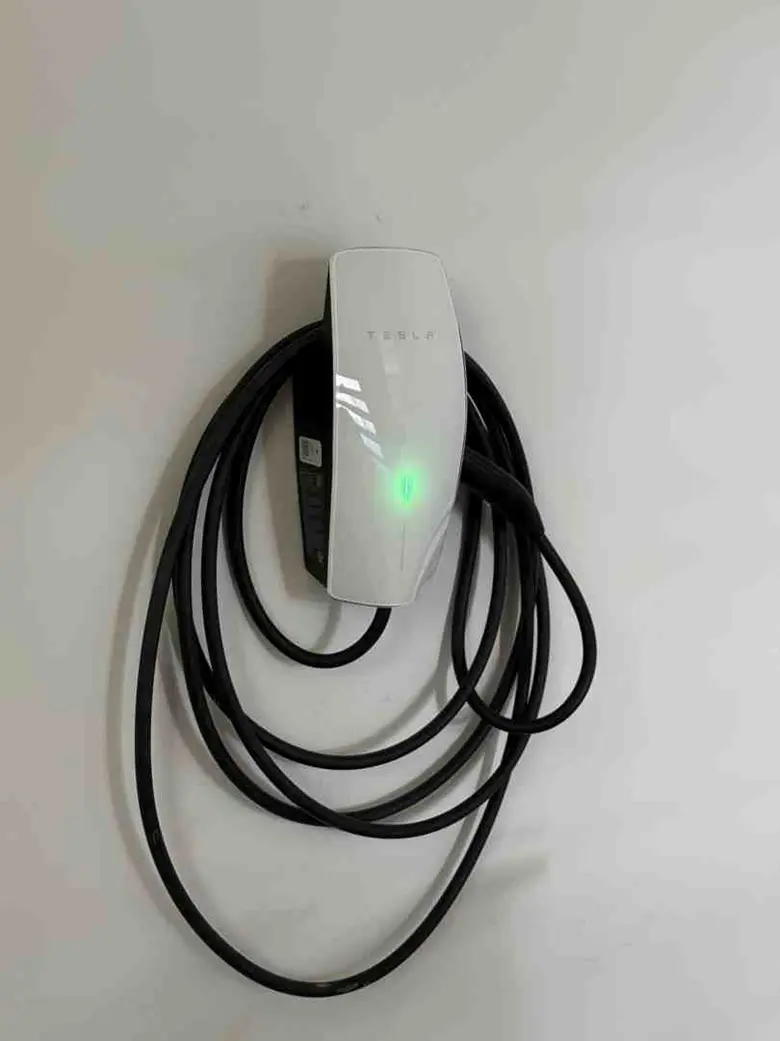

Understanding EV Charger Levels and Technical Specifications
Welcome to the electric vehicle (EV) revolution! More and more homeowners are choosing EVs. With this choice comes the need for easy charging. We know that relying on public chargers can be a hassle. Installing your own EV charger at home changes everything.
Many EV owners start with a Level 1 charger. It plugs into a standard wall outlet. But these chargers are slow. They can take over 20 hours to fully charge a car. This is often not enough for daily driving.
A Level 2 charger offers a much better solution. It charges your EV significantly faster. This means you wake up to a fully charged car every day. This guide will help you understand how to install a Level 2 EV charger at home. We will cover charger types, electrical needs, installation steps, costs, and rebates. Our goal is to make home EV charging simple and stress-free for you.
When considering an EV home charger, understand the different charging levels available. These levels dictate the speed and power delivery to your electric vehicle. For residential installations, Level 1 and Level 2 are the primary options, while Level 3 is typically reserved for commercial or public fast-charging stations.
Level 1 Charging
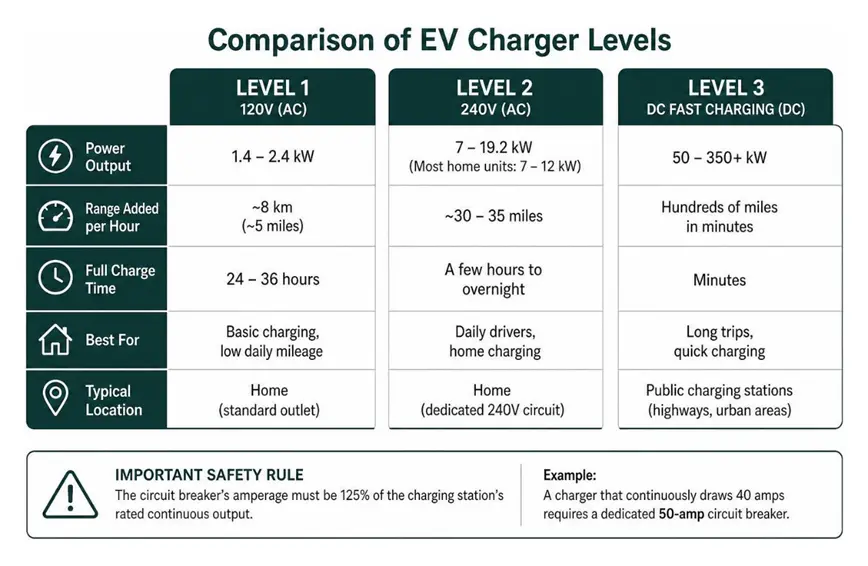
Level 1 chargers use a standard 120-volt (V) household outlet, delivering between 1.4 to 2.4 kilowatts (kW) of power. This translates to adding approximately 8 kilometers (5 miles) of driving range per hour of charging. While convenient because it requires no special installation, Level 1 charging is the slowest option. A full charge can take 24 to 36 hours, making it less practical for daily use, especially for vehicles with larger batteries or for drivers with longer commutes. In fact, our research indicates that as of September 2026, about 60% of EV owners who initially relied on Level 1 charging are now seeking an upgrade to Level 2 for better convenience and efficiency.
Level 2 Charging
Level 2 chargers are the most popular choice for home installations. They operate on a 240V circuit, similar to what powers large appliances like electric clothes dryers or ovens. These chargers deliver significantly more power, typically ranging from 7 kW to 19.2 kW, though most home units are in the 7-12 kW range. This allows for approximately 30 to 35 miles of range to be added per hour, meaning a full battery recharge can occur in just a few hours or conveniently overnight. Level 2 charging ensures your vehicle is ready for your daily commute each morning.
Level 3 Charging (DC Fast Charging)
Level 3 chargers, also known as DC Fast Chargers or Superchargers, provide direct current (DC) power at much higher voltages and amperages. They can deliver anywhere from 50 kW to over 350 kW, capable of adding hundreds of miles of range in minutes. However, these powerful units are not suitable for residential installation due to their immense electrical requirements and cost. They are primarily found at public charging stations along highways and in urban centers.
When installing any EV charger, a critical safety rule applies: the circuit breaker’s amperage must be 125% of the charging station’s rated continuous output. For instance, a charger that continuously draws 40 amps requires a dedicated 50-amp circuit breaker. This ensures the electrical system can safely handle the sustained load over long charging sessions.
Below is a comparison of the different EV charging levels:
Single-Phase vs. Three-Phase Power
Most residential properties in North America operate on a single-phase electrical system, which provides the 240V supply needed for Level 2 chargers. Three-phase power, offering higher voltage and current, is typically found in commercial or industrial settings. For home EV charging, we will primarily focus on single-phase 240V installations. The EV’s onboard charger converts the incoming AC (alternating current) electricity from the grid into DC power to charge the battery. The efficiency and speed of this conversion are limited by the vehicle’s onboard charger capacity.
Hardwired Systems vs. NEMA Outlets
When installing a Level 2 charger, you generally have two options for connection: hardwiring or using a NEMA outlet.
A NEMA 14-50 outlet is a common 240V, 50-amp receptacle often used for RVs or electric ranges. Many Level 2 chargers are designed to plug directly into this type of outlet. This offers flexibility, as the charger can be unplugged and potentially moved. However, it’s crucial for a certified electrician to verify that any existing NEMA 14-50 outlet is suitable for the continuous, heavy current draw of an EV charger. Unlike a dryer, which cycles on and off, an EV charger demands a steady power supply for hours, which can strain an inadequately rated or installed outlet. Some sources note that nuisance tripping can occur with GFCI breakers in 240V outlets when combined with the EV charger’s internal GFCI protection, which can be frustrating.
Hardwired installations involve permanently connecting the EV charger directly to your home’s electrical system. This approach is generally recommended for chargers drawing more than 40 amps and offers several benefits:
- Continuous Current: Hardwiring provides a more stable and reliable connection for prolonged, high-power charging, reducing the risk of overheating or loose connections associated with plug-in options.
- Weatherproof Durability: For outdoor installations, hardwired units can offer superior weatherproofing as there are no exposed plugs or receptacles.
- Connection Stability: A direct connection minimizes points of failure, contributing to greater safety and longevity of the system.
- Future-Proofing: As EV batteries grow larger and charging speeds increase, hardwiring can better accommodate higher amperage chargers that may become standard in the future.
We generally recommend a hardwired installation for optimal safety and performance, especially given the continuous heavy current draw over many hours.
Electrical Capacity and Planning for Grounded Solutions EV Installation
Before installing a Level 2 EV charger, one of the most critical steps is to assess your home’s existing electrical service panel. This panel is the central hub for your home’s electricity, distributing power to all circuits. An EV charger represents a significant additional load, and your panel must have sufficient capacity to handle it safely without overloading.
Most modern homes are built with a 200-amp electrical service, which is generally considered the minimum adequate capacity to support an EV charger alongside other major appliances. However, many older homes may have 100-amp service, which often proves insufficient without an upgrade. Overloading an electrical panel can lead to tripped breakers, power outages, and, more dangerously, electrical fires.
Understanding your home’s electrical needs and planning for an EV charger can be complex. For detailed guidance on assessing your electrical system and planning your installation, we recommend exploring resources like the insights provided by Grounded Solutions EV installation. Their expertise can help navigate the technical requirements and ensure a safe and efficient setup.
A qualified electrician will perform a load calculation to determine how much spare capacity your panel has. This involves adding up the amperage draw of all your major appliances (HVAC, water heater, oven, dryer, etc.) and comparing it to your panel’s total capacity. If the calculations show insufficient capacity, you may need an electrical panel upgrade or other power management solutions.
Assessing Panel Capacity for Grounded Solutions EV Installation
To confirm your home’s electrical capacity, we advise reviewing your past 12 months of electricity meter data. This can provide valuable insights into your typical peak usage. However, the most reliable method is to consult with a licensed electrician. They can physically inspect your electrical panel, identify available breaker space, and accurately assess your home’s total electrical load.
If your main electrical panel lacks sufficient capacity or available breaker slots, several solutions exist:
- Subpanel Installation: An electrician can install a smaller subpanel that draws power from the main panel, providing dedicated circuits for the EV charger and other new loads.
- Smart Energy Management Devices: These devices can intelligently manage your home’s electrical load, temporarily reducing power to non-essential appliances when the EV is charging, or dynamically adjusting the EV charger’s power draw to stay within the panel’s limits. This can often prevent the need for a costly full panel upgrade.
- Panel Upgrade: If your home has a 100-amp service or is otherwise significantly constrained, a full electrical panel upgrade to 200 amps or more might be necessary. While this is a more substantial investment, it ensures your home can safely support current and future electrical demands.
Wiring and Distance Considerations for Grounded Solutions EV Installation
The distance between your electrical panel and the chosen charger location significantly impacts installation costs. The farther the distance, the more wiring is required, and potentially more labor for running conduit through walls, ceilings, or even trenching outdoors.
For Level 2 chargers, copper wiring is standard. The gauge (thickness) of the wire needed depends on the charger’s amperage:
- For 32-amp or 40-amp service, 8 AWG (American Wire Gauge) cable is typically used.
- For higher 48-amp service, 6 AWG cable is recommended.
Using the correct wire gauge is critical for safety and efficiency, preventing overheating and voltage drop, which can reduce charging speed. If you have older aluminum wiring, it’s important to note that some modern chargers are compatible with safe, aluminum wiring systems. This compatibility can drastically reduce installation costs by avoiding a full rewiring to copper.
Longer wire runs can also lead to voltage drop, slightly reducing the power delivered to the charger. While usually minor for typical residential distances, an electrician will factor this into their calculations. Trenching for underground wiring can add considerable expense, ranging from $15 to $25 per meter, depending on soil conditions and complexity.
Step-by-Step Process for Installing a Level 2 Home Charger
Installing a Level 2 EV charger is a multi-step process that requires careful planning and professional execution to ensure safety and compliance with electrical codes. While the specific details may vary slightly based on your home’s unique electrical system and local regulations, the general steps remain consistent.
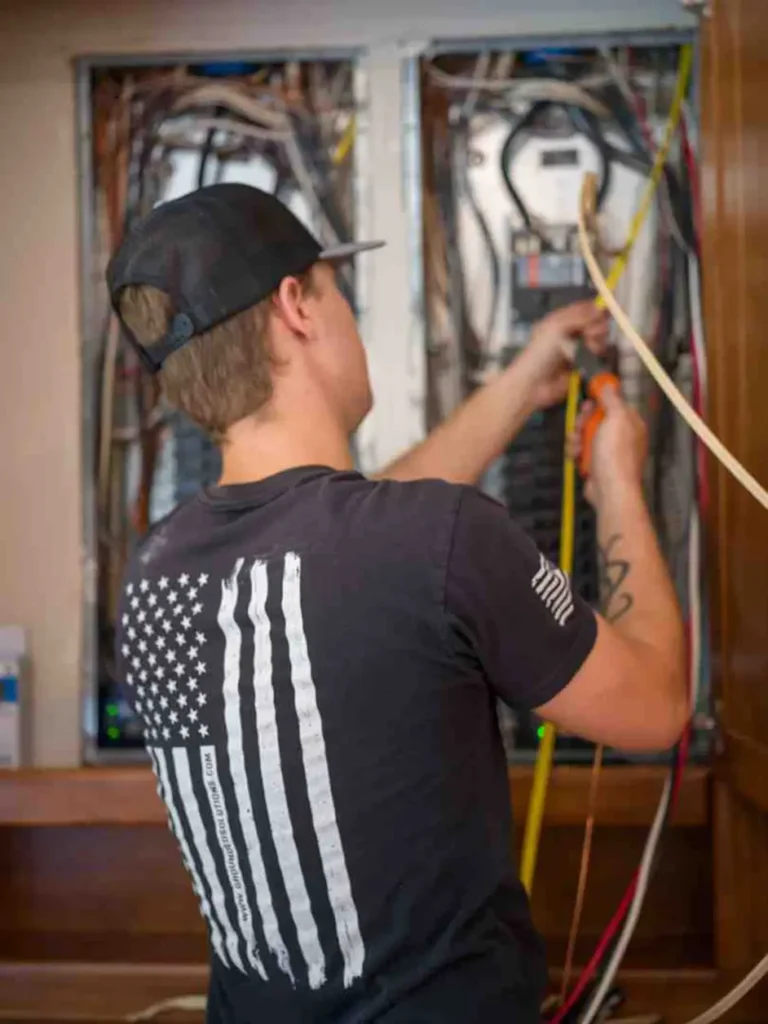
- Initial Site Evaluation: A licensed electrician will visit your home to assess your electrical panel’s capacity, identify the best location for the charger, and determine the most efficient route for wiring. They will consider factors like proximity to your parking spot, distance from the electrical panel, and whether the installation will be indoors or outdoors.
- Charger Selection: Based on your vehicle’s charging needs and your home’s electrical capabilities, you will choose an appropriate Level 2 charger. Considerations include amperage, cord length, smart features, and whether it will be hardwired or plug into a NEMA outlet.
- Obtain Permits: Before any work begins, the electrician will secure the necessary electrical permits from your local municipality or relevant authority. This ensures the installation meets all local building codes and safety standards.
- Circuit Installation: A dedicated 240V circuit with the appropriate amperage (e.g., 40-50 amps) will be installed from your main electrical panel to the charger location. This includes installing a new double-pole circuit breaker and running the correct gauge wiring.
- Mounting Hardware: The EV charging unit is securely mounted to a wall stud or other stable surface at the chosen location. For outdoor installations, the unit must be rated for exterior use and properly protected from the elements.
- Safety Grounding and Wiring: The electrician will connect the wiring to the charger, ensuring proper grounding and secure electrical connections. This is a critical safety step to prevent electrical hazards.
- Startup Testing: Once installed, the electrician will perform comprehensive testing to ensure the charger is functioning correctly, delivering the expected power, and that all safety mechanisms are operational. They will also typically demonstrate its use and explain any smart features.
- Final Inspection: After installation, a municipal inspector will review the work to confirm it adheres to all local codes and safety regulations. This final inspection is crucial for homeowner peace of mind and insurance purposes.
Permitting and Local Electrical Codes
Permits are a non-negotiable part of EV charger installation. Electrical work, especially involving high-voltage circuits, is subject to strict regulations to protect homeowners from hazards. Your licensed electrician will typically handle the permit application process, ensuring all documentation is submitted correctly and inspections are scheduled.
The installation must comply with the National Electrical Code (NEC) and any additional local building codes specific to your municipality. These codes dictate wiring methods, overcurrent protection, grounding, and safety devices like Ground-Fault Circuit Interrupters (GFCIs). The cost of permits for EV charger installation typically ranges from $100 to $300, a small investment for ensuring safety and legality.
For installations in multi-unit residential buildings (MURBs), the permitting process can be more complex due to multiple stakeholders, including building management, strata councils, and other residents. This often requires additional planning and approvals beyond a single-family home.
Dedicated Circuit Breaker Setup
A Level 2 EV charger requires a dedicated circuit breaker in your electrical panel. This means the charger will have its own circuit, preventing it from sharing power with other appliances and reducing the risk of overloading.
The electrician will install a double-pole breaker (which occupies two slots in your panel) sized appropriately for your charger’s continuous draw, adhering to the 125% rule (e.g., a 40-amp charger needs a 50-amp breaker). They will also ensure proper GFCI protection is in place. While some chargers have built-in GFCI, integrating it correctly with the panel’s breaker is vital to avoid “nuisance tripping,” where the charger’s GFCI and the breaker’s GFCI conflict, causing unnecessary power interruptions. A properly configured dedicated circuit ensures stable, safe, and reliable charging.
Costs, Incentives, and Long-Term Energy Management
The decision to install a home EV charger involves understanding both the upfront investment and the potential for long-term savings and benefits. While installation costs can vary significantly, numerous incentives can help offset these expenses.
Equipment and Installation Costs
The cost of a Level 2 EV charger unit typically ranges from $300 to $800, depending on its features, brand, and power output. The installation expenses, however, are more variable. Generally, professional installation costs can range from $1,000 to $3,000, excluding the price of the charging unit itself. This range accounts for standard installations where the electrical panel has sufficient capacity and is relatively close to the charging location.
However, if your home requires significant electrical upgrades, such as a full panel upgrade from 100 amps to 200 amps, the total cost can easily climb higher, potentially reaching $3,500 or more. Factors influencing these costs include:
- Electrical Panel Capacity: If your panel is old or lacks sufficient spare capacity, an upgrade or subpanel installation will add to the cost.
- Distance to Panel: Longer wiring runs from the electrical panel to the charger location increase material and labor costs, especially if trenching or extensive conduit work is required.
- Wiring Type: While rarer now, if your home has problematic older aluminum wiring that needs to be replaced with copper for safety, this can add significant expense.
- Permit Fees: As mentioned, permits are required and typically cost $100-$300.
- Location: Outdoor installations may require more weather-resistant components and specific conduit, potentially increasing costs compared to an indoor garage installation.
Despite these potential costs, the long-term convenience and savings often make the investment worthwhile. Over 80% of EV owners charge at home, highlighting its importance for the EV experience. Furthermore, installing an EV charger can slightly increase your home’s resale value, making it an attractive feature for future buyers.
Maximizing Utility Rebates and Off-Peak Charging
To make home EV charger installation more affordable, various rebates and incentives are available. As of September 2026, the federal tax credit for EV charger installation covers up to 30% of the total costs, with a maximum credit of $1,000. This credit applies to both the charger unit and installation expenses.
Beyond federal programs, many states, provinces, and local utility companies offer their own incentives. These can include:
- Direct Rebates: Some utilities provide direct rebates that cover a percentage of the charger and installation costs, such as programs that cover up to 50% of costs, typically capped at a few hundred dollars.
- Smart Charger Incentives: Additional funding may be available for “smart” EV chargers that can communicate with the grid, allowing for demand response programs.
- Time-of-Use (TOU) Pricing Plans: Many electricity providers offer TOU plans, where electricity rates vary throughout the day. Charging your EV during “off-peak” hours, typically overnight (e.g., 11 p.m. to 7 a.m.), can significantly reduce your electricity costs. Conversely, charging during “on-peak” hours (e.g., 4 p.m. to 9 p.m.) can be more expensive.
To take full advantage of TOU pricing, consider a smart EV charger with programmable scheduling features. This allows you to set your charger to automatically begin charging when rates are lowest, optimizing your energy costs and reducing demand on the grid during peak times. Some utilities even offer the option of installing a second, dedicated electrical meter for your EV charger, allowing you to enroll in specific EV charging rate plans that offer even greater savings.
Frequently Asked Questions About EV Home Charger Installation
We often encounter common questions from homeowners considering an EV charger. Here, we address some of the most frequent inquiries to provide clarity and guidance.
Can I install a Level 2 EV charger myself, or do I need to hire a professional?
While the idea of a DIY installation might seem appealing to save money, we strongly advise against attempting to install a Level 2 EV charger yourself unless you are a licensed and experienced electrician. Level 2 chargers operate on 240 volts and high amperages, presenting significant electrical risks if not installed correctly. Improper installation can lead to:
- Electrical Fires: Faulty wiring or overloaded circuits are serious fire hazards.
- Electric Shock: Working with high voltage without proper training and safety equipment can result in severe injury or fatality.
- Code Violations: Installations that don’t meet local electrical codes can lead to fines, require costly re-work, and may void your home insurance.
- Warranty Issues: Many charger manufacturers void the product warranty if installation is not performed by a certified professional.
Our research indicates that approximately 79% of U.S. homeowners do not feel confident installing an at-home EV charger themselves. Hiring a licensed, qualified electrician ensures the job is done safely, correctly, and in compliance with all regulations. They will pull the necessary permits, perform load calculations, and conduct post-installation testing and inspections, providing you with peace of mind.
How much does it cost to upgrade an electrical panel for an EV charger?
The cost to upgrade an electrical panel can vary widely depending on several factors, but it typically falls within a range of $200 to $3,500. This cost is in addition to the charger unit and standard installation. Key factors influencing the upgrade cost include:
- Current Panel Capacity: Upgrading from a 100-amp panel to a 200-amp panel is more involved and costly than simply adding a subpanel or a few new breakers to an already sufficient panel.
- Labor Rates: Electrician labor rates vary by region.
- Material Costs: The cost of the new panel, breakers, and associated wiring.
- Utility Coordination: In some cases, a service upgrade might require coordination with your local utility company, which can sometimes involve additional fees or longer timelines.
- Complexity: The physical location of the panel, ease of access, and any unforeseen structural challenges can impact labor time and cost.
If your home’s electrical panel capacity is insufficient, an electrician will provide a detailed quote for the necessary upgrades. While this adds to the initial investment, it’s a crucial step to ensure your home’s electrical system can safely support your EV charger and other household demands for years to come.
What is the ideal location to mount a home charging station?
Choosing the right location for your home EV charger is important for convenience, safety, and efficiency. We recommend considering the following factors:
- Proximity to Parking Spot: The most practical location is typically near where you park your EV. Most charging stations come with a 20-foot or 25-foot cord, so ensure the charger can comfortably reach your vehicle’s charge port without stretching the cable.
- Garage or Covered Area: If possible, installing the charger inside a garage or under a carport offers protection from the elements, which can prolong the unit’s lifespan. It also provides a secure location.
- Outdoor Weatherproofing: If an indoor location isn’t feasible, many EV chargers are designed for outdoor use and are waterproof. Ensure any outdoor installation is rated for exterior conditions and mounted in a location that minimizes exposure to direct sunlight, rain, or snow.
- Proximity to Electrical Panel: As discussed earlier, placing the charger closer to your main electrical panel can significantly reduce installation costs by minimizing wiring runs.
- Accessibility: Ensure the charger is mounted at a convenient height and in a location that doesn’t obstruct walkways or garage doors.
The ideal location balances convenience, safety, and cost-effectiveness, tailored to your home’s layout and your driving habits.
Conclusion
The journey to electric vehicle ownership is made significantly smoother and more convenient with a dedicated home charging station. By understanding the different charging levels, assessing your home’s electrical capacity, and following a professional installation process, you can enjoy the unparalleled reliability of waking up to a fully charged EV every day.
We’ve explored the benefits of Level 2 charging, the critical role of your home’s electrical panel, and the importance of professional installation for safety and code compliance. We’ve also highlighted the various cost factors and the valuable incentives available to make this upgrade more accessible.
Investing in a home EV charger is not just about convenience; it’s about embracing a sustainable future, maximizing your EV’s potential, and potentially increasing your home’s value. With careful planning and the expertise of qualified professionals, you can confidently make the switch to effortless home EV charging.







Leave a Comment